Showing posts with label sony. Show all posts
Showing posts with label sony. Show all posts
Monday, November 24, 2014
Sony Ericsson Z520i Disassembly Guide
For some people, maybe it is hard to assembly or disassembly a mobile phones, especially flip or slide model mobile phones like Sony Ericsson Z520i. The damage that often occur in this model is flexible wire. When the flexible wire broken, it can cause a damage like no display etc.
To improve or repair this damage, of course we have to replace the flexible wire with the new one. But, to replace it, we must disassembly the phone first. Therefore, in this section, Phone Repairing will provide a guide about how to dismantle or disassembly the Sony Ericsson Z520i.
Check it out :
Wednesday, November 19, 2014
Sony Ericsson K750 Insert Sim

Sony Ericsson K750 Insert Sim ,
Sony Ericsson K750 Insert Sim Card,
Sony Ericsson K750 Sim Ic Ways,
Sony Ericsson K750 Sim Card Not Working,
Sony Ericsson K750 Sim ic jumper,
Sunday, November 2, 2014
How to Master Reset or Hard Reset a Sony Ps3
reset to factory settings

Hard Reset procedure for the PS3 Be sure to backup your settings/games saves by doing a System > Backup on your PS3 or you may lose your game saves! Also, this is a last resort procedure prior to exchanging/returning to sony.
1. Power Off the PS3 via the power switch in back and power back on w/switch.
2. Hold Power Button on the Front until you hear 3 beeps.
3. Then go through the initial setup and then run a full Format via System > Format. (will take approx 3 1/1 hours). You may need to have our AV cables ready if your using HDMI (in case HDMI isnt detected after initial reset).
4. Restore your backup you made prior to doing factory/hard reset (optional, if you created a backup).
Hopefully this will solve your freezing problems.Problems/symptons that this appears to have resolved:
-freezing when doing anything
-no harddrive activity
-freezing when trying to use onboard keyboard or bringing up keyboard
-game/movie disc freezes system
Sony Ericsson K300 K500 K700 Mic Ways Solution for Mic Not Working Problem
 |
| Easy Jumpers for K300/K500/K700 Mic Problem |
 |
 | ||
| Another interesting for K300 Mic Problem |
 |
| K300 Mic Solution |
Wednesday, October 15, 2014
How to Transfer Files Using Media Transfer Mode Via Wi Fi on Sony Xperia Z2 Tablet
 Transferring files in Sony Xperia Z2 Tablet is now made easy by using the Media Transfer Mode. You can easily transfer files between your device and other MTP compatible devices such as computer, using a Wi-Fi connection. But before you can transfer files wirelessly, you will need to pair both devices.
Note: You will need a Wi-Fi enabled devices that supports Media transfer such as a computer running Microsoft, Windows Vista orWindows 7.
To pair your device with the computer:
- Check if the media transfer mode of your device is enabled. It is normally enabled by default.
- Using the USB cable, connect your device to a computer.
- On your computer, once the name of your device appear, click on Network Configuration and just follow the steps on how to pair the computer.
- After pairing, safely disconnect your device from your computer.
These steps will work only on Windows 7 OS and the computer is connected to the Wi-Fi Access point via network cable.
To connect paired devices wirelessly in Media Transfer Mode:
- First things first, check if the media transfer mode is enabled.
- On your Home Lcd, tap on the Menu icon.
- Select Settings > Xperia > USB connectivity.
- Then tap the paired device that you want to connect to under Trusted devices.
- Tap connect.
If you want to disconnect, just tap on the paired device and tap Disconnect.
If you want to remove the paired device, tap on the paired device you want to remove and select Forget.
Friday, September 26, 2014
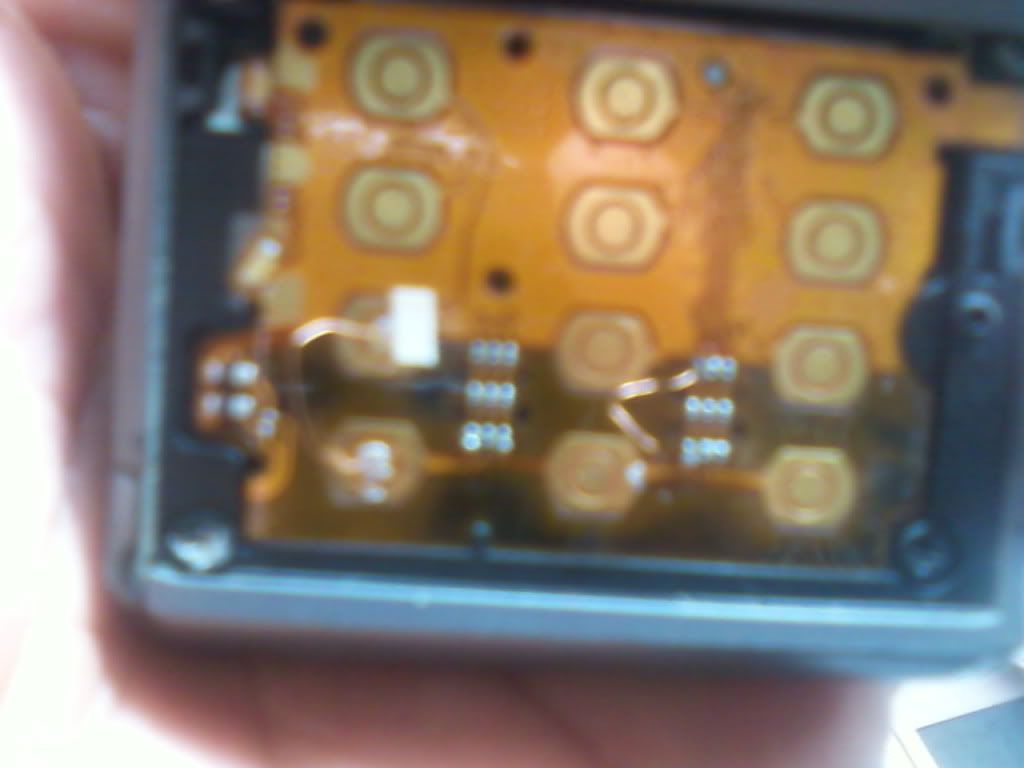
Sony Ericsson k750 Mic Solution
if you check it much give few comments about this so that others can learn form your comments also.
If you have any other Questions please do not hesitate to share with me.
How to Screen Mirror Sony Xperia Z2 to Show the Screen on a TV
The Screen Mirroring will allow you to show the Lcd of your device on a TV or other large display without using a cable connections. It uses the Wi-Fi Direct technology that create a wireless connection between two devices. You can also use this feature to listen to music from your phone via the TVs speakers.
Warning: Your TV must support Lcd mirroring based on Wi-Fi CERTIFIED Miracast™ for thenfunctionality described above to work. If your TV does not support Lcd mirroring, you need to purchase a wireless display adapter separately.
Warning: When using Lcd mirroring, the image quality may sometimes be negatively impacted if there is interference from other Wi-Fi® networks.
How to mirror the Lcd of your phone on a TV:
1. First you need to turn on the Lcd mirroring function on your TV. Just follow the instructions in the User Guide of your TV.
2. From your Home Lcd, tap on the .
.
3. Select on Settings, and tap Xperia™.
4. Choose Screen mirroring.
5. Tap to turn on the Screen mirroring and select a device.
Warning: When using Lcd mirroring, do not cover the Wi-Fi antenna area of your device.
Read More..
Warning: Your TV must support Lcd mirroring based on Wi-Fi CERTIFIED Miracast™ for thenfunctionality described above to work. If your TV does not support Lcd mirroring, you need to purchase a wireless display adapter separately.
Warning: When using Lcd mirroring, the image quality may sometimes be negatively impacted if there is interference from other Wi-Fi® networks.
How to mirror the Lcd of your phone on a TV:
1. First you need to turn on the Lcd mirroring function on your TV. Just follow the instructions in the User Guide of your TV.
2. From your Home Lcd, tap on the
.3. Select on Settings, and tap Xperia™.
4. Choose Screen mirroring.
5. Tap to turn on the Screen mirroring and select a device.
Warning: When using Lcd mirroring, do not cover the Wi-Fi antenna area of your device.
Friday, September 5, 2014
How to Change Time Date on Sony Xperia Z
To manually set the date:
1. On your Home screen, tap the.
2. Select Settings, then tap Date & Time.
3. You need to uncheck the Automatic date & time. If it is set to automatic.
4. Then tap on Set time, and adjust the time by scrolling up and down.
5. To confirm the changes, tap Done.
If you want to change the timezone:
1. On your Home screen, tap the.
2. Select Settings, then tap Date & Time.
3. You need to uncheck the Automatic date & time. If it is set to automatic.
4. Then tap on Select time zone.
5. Find your preferred time zone in the option.
Read More..
1. On your Home screen, tap the .
2. Select Settings, then tap Date & Time.
3. You need to uncheck the Automatic date & time. If it is set to automatic.
4. Then tap on Set date, and adjust the date by scrolling up and down.
5. To confirm the changes, tap Done.
To manually set the time:
.2. Select Settings, then tap Date & Time.
3. You need to uncheck the Automatic date & time. If it is set to automatic.
4. Then tap on Set date, and adjust the date by scrolling up and down.
5. To confirm the changes, tap Done.
To manually set the time:
1. On your Home screen, tap the
.2. Select Settings, then tap Date & Time.
3. You need to uncheck the Automatic date & time. If it is set to automatic.
4. Then tap on Set time, and adjust the time by scrolling up and down.
5. To confirm the changes, tap Done.
If you want to change the timezone:
1. On your Home screen, tap the
.2. Select Settings, then tap Date & Time.
3. You need to uncheck the Automatic date & time. If it is set to automatic.
4. Then tap on Select time zone.
5. Find your preferred time zone in the option.
Sunday, August 31, 2014
How to Screen Mirror Sony Xperia Z1 to Show the Screen on a TV
The Screen Mirroring will allow you to show the screen of your device on a TV or other large display without using a cable connections. It uses the Wi-Fi Direct technology that create a wireless connection between two devices. You can also use this feature to listen to music from your phone via the TVs speakers.
Warning: Your TV must support screen mirroring based on Wi-Fi CERTIFIED Miracast™ for thenfunctionality described above to work. If your TV does not support screen mirroring, you need to purchase a wireless display adapter separately.
Warning: When using screen mirroring, the image quality may sometimes be negatively impacted if there is interference from other Wi-Fi® networks.
How to mirror the screen of your phone on a TV:
1. First you need to turn on the screen mirroring function on your TV. Just follow the instructions in the User Guide of your TV.
2. From your Home screen, tap on the.
3. Select on Settings, and tap Xperia™.
4. Choose Screen mirroring.
5. Tap to turn on the Screen mirroring and select a device.
Warning: When using screen mirroring, do not cover the Wi-Fi antenna area of your device.
Read More..
Warning: Your TV must support screen mirroring based on Wi-Fi CERTIFIED Miracast™ for thenfunctionality described above to work. If your TV does not support screen mirroring, you need to purchase a wireless display adapter separately.
Warning: When using screen mirroring, the image quality may sometimes be negatively impacted if there is interference from other Wi-Fi® networks.
How to mirror the screen of your phone on a TV:
1. First you need to turn on the screen mirroring function on your TV. Just follow the instructions in the User Guide of your TV.
2. From your Home screen, tap on the
.3. Select on Settings, and tap Xperia™.
4. Choose Screen mirroring.
5. Tap to turn on the Screen mirroring and select a device.
Warning: When using screen mirroring, do not cover the Wi-Fi antenna area of your device.
Thursday, August 28, 2014
How to Turn on Mobile Bravia Engine on Sony Xperia Z
Mobile Bravia Engine is a pre-installed technology on Sony Xperia Z which allows you to view photos and videos in a clearer, sharper and more natural way. This technology might consume more battery but its worth it when you use it to view images in a nicer way. Heres how you can turn on Mobile Bravia Engine on Sony Xperia Z.
1. On your devices homescreen, tap .
.
2. Then find and tap Settings.
3. Go to Display.
4. And mark the Mobile BRAVIA Engine 2 checkbox if its not marked.
Now youre ready to view those captured moments in a clearer, sharper and more natural way.
Read More..
1. On your devices homescreen, tap
.2. Then find and tap Settings.
3. Go to Display.
4. And mark the Mobile BRAVIA Engine 2 checkbox if its not marked.
Now youre ready to view those captured moments in a clearer, sharper and more natural way.
Friday, August 22, 2014
Monday, August 18, 2014
Subscribe to:
Posts (Atom)